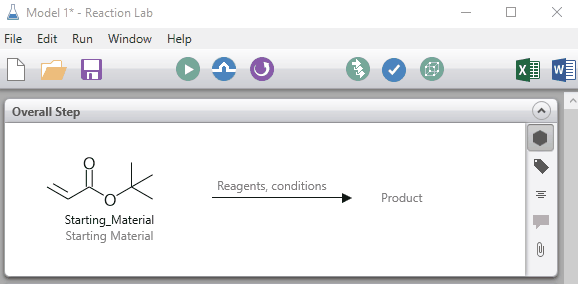
What is the Overall Step?
The overall reaction step is a visual representation of the chemical reaction (shown below). You can import your chemical structures from different chemical drawing packages, such as ChemDraw or Marvin Sketch by copying and pasting, or by importing a file. The file formats supported are cdx, cdxml, sdf and mol files. An overall step can have more than one or more reactant(s) and one or more product(s). Each time you define a reactant or product, Reaction Lab will display a  to the right of the name, allowing you to add another.
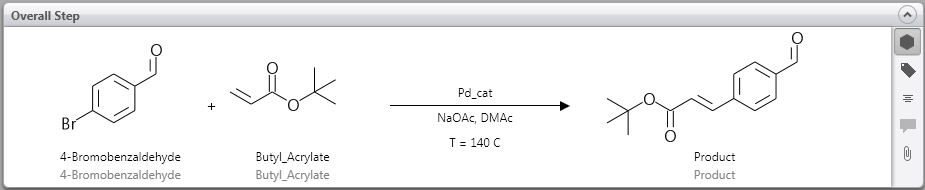
Overall Step for the Heck Reaction
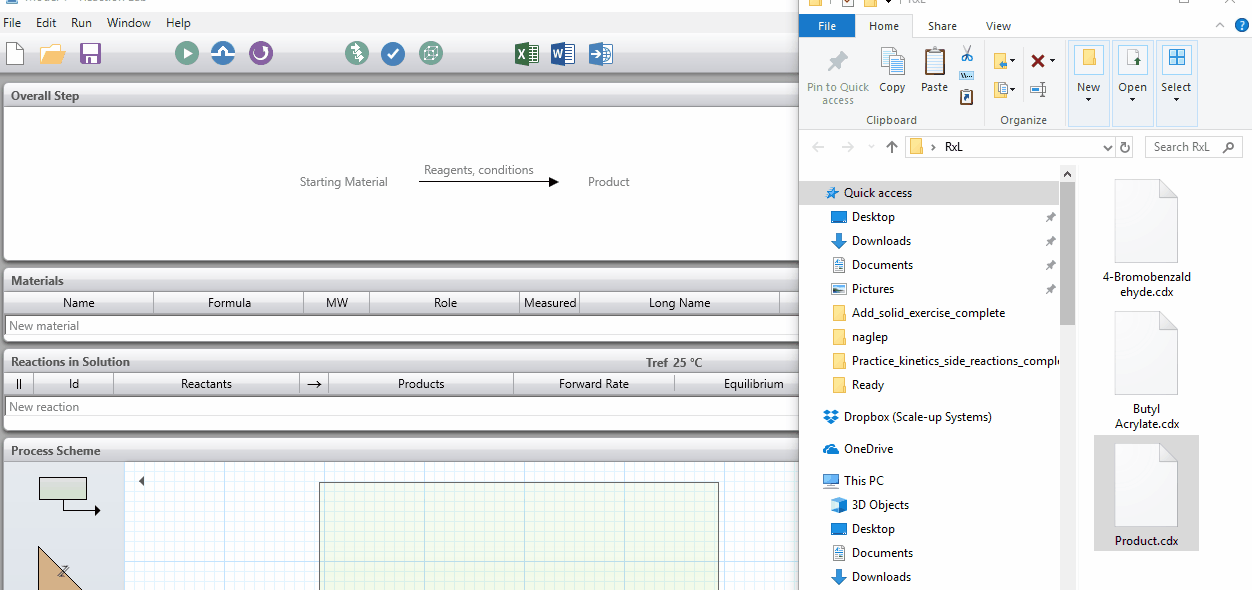
In the example below, we have a reaction of 4-bromobenzaldehyde reacting with butyl acrylate in the presence of a palladium catalyst, NaOAc in DMAC. We will start building the Overall Step with the cdx files for the starting materials and product of the reaction by importing the file to Reaction Lab.
How can I add the chemical structures of my starting materials and products to the overall step?
There are three ways of doing this:
1. You can select materials from our materials database. To do this, click on either Starting Material or Product in the Overall Step. This will bring you to a dropdown menu where you can select a material for your reaction. The droplist is ordered in the following way: element elements, reagents/products, solvents, gases. You can start typing to narrow the list of choices. Once a material is selected from the database, it will appear in the Materials section for this model. Please note that the "Reagents, conditions" above the reaction arrow are only textboxes and will not import materials from the materials database. See more information on the materials database in the section below.
2. You can also import materials from your own files using drag and drop. Once you drop the file, a material with the same name as the file will also be added into the Materials section.
3. You can also copy and paste a structure from many different chemical drawing packages. For example, if you copy a structure from a cdx or cdxml file, and paste it in the Overall Step, its chemical formula will be provided below the structure. If you hover over the structure, you will see a tooltip that contains an image of the structures, along with the following information: chemical formula, molecular weight, role, and where it is present in the Reaction Lab Model. If the structure is pasted as a Starting Material, then its name, formula, molecular weight and its role will be filled in in the Materials section. An extra column with the Material name will also be added in the Scenarios and Experimental Data sections.
Structures and be imported from any of the following chemical drawing packages:
| Source |
File Type |
| Chem Draw |
cdx, cdxml |
| Biovia |
mol |
| Chem Doodle |
cdx, cdxml, sdf, mol |
| Marvin Sketch |
cdx, mol |
| ACD labs |
mol |
| PubChem |
sdf |
Materials database
This is composed of solvents, reagents and elements. Each of these is described below:
1. Elements: (icon =  ) This is a list of all the elements.
2. Reagents: (icon =  ) The reagent database is composed of over 500 reagents, each of which contains a structure and molecular weight. An example is (R)-BINOL.
3. Solvents: (icon =  ) The solvent library is composed of 196 solvents. Each solvent has a structure, and molecular weight once imported to the RxL model.
4. Gases: (icon =  ) This is a list of gases such as hydrogen and argon gas.
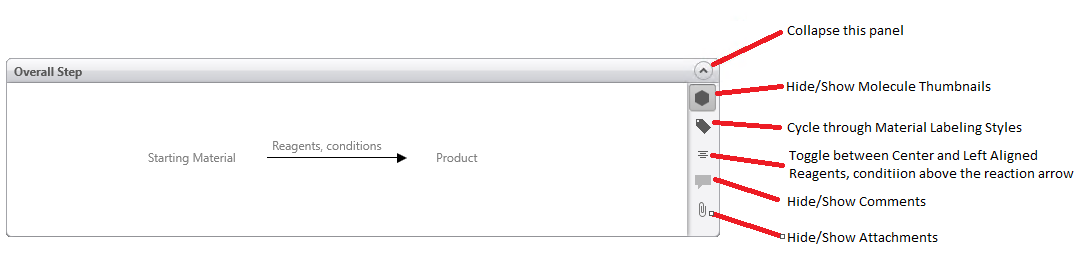
Hide/Show Molecular Thumbnails
This is the hexagonal icon located on the right of the overall step panel  .
.
Clicking on this will show the thumbnails (chemical structure of the starting materials and products). If you want to hide them, click on it again so that it is grayed out.
Different forms of Materials labeling styles
To change the way the Materials are labeled, click on the  icon that is located on the right-hand side of the Overall Step panel as shown below. If this material was imported into Reaction Lab from a ChemDraw file, you will see two names. In the example below, the file names were 4-Bromobenzaldehyde, Butyl Acrylate and Product. This will be the original name (i.e. without underscores) name and will be in grey). The name above this will be in black and is the one used in Reaction Lab. If the file contained spaces, these spaces will be replaced with underscores as material names cannot have a space in them. Other characters that will be replaced with an underscore are listed ¬ ` £ $ % ^ & ( ) { } [ ] ; @ ' ~ #
Click on the icon to change the labeling style. The options are:
(i) no labels,
(ii) Reaction Lab generated label,
(iii) the original filename label and
(iv) both labels. This is shown below.
Changing the alignment of the Reagents, conditions from left-aligned to center-aligned and back
To change the alignment of the Reagent and conditions on the reaction arrow, click on the  icon located on the right-hand side of the Overall Step panel.
Comments section
To open up the Comments section, click on the  icon. This will open the Comments below the Overall Step, as shown below:
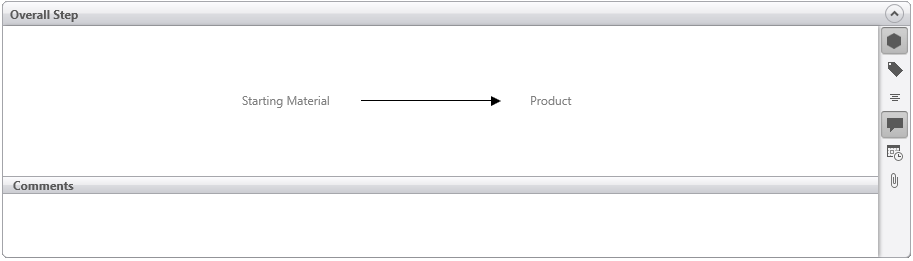
In this section, you can type in notes about the reaction, for example, different conditions that have been used before, and suggested conditions for future reactions. To insert the time and date of the comment, click on the  icon.
icon.
To hide the Comments section click on the Comments icon again. When it is hidden, it will be grayed out.
Attachments section
To open up the Attachments section, click on the  icon. This will open the Attachments below the Overall Step (and below the Comments section if this is open), as shown below:
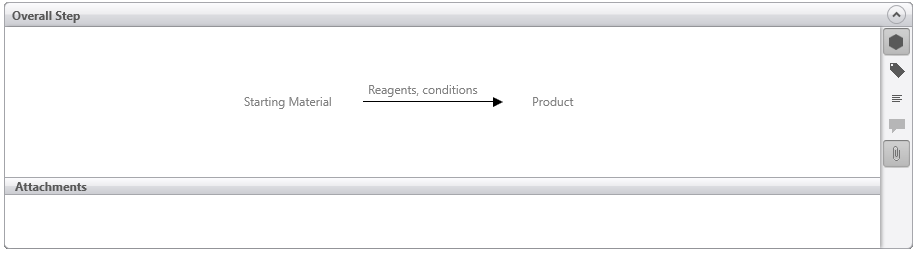
You can attach a file by right-clicking in the Attachments section. You will see one option, to Attach Files. Selecting this will open a window where you can choose a file to attach. Alternatively you can drag and drop the file from your desktop to the Attachment section. Once there is a file attached, it will look like the following:

You can open this file by right-clicking on the file and selecting Open, or by double clicking on it.
Alternatively, you can save the file on your desktop by right-clicking and selecting save.
If you want to remove the file from the model, select Remove in the right-click menu
To hide the Attachments section click on the Attachments icon again.