Reaction Lab is available in 4 languages: English, Japanese, Korean and Chinese.
When you open Reaction Lab for the first time, it checks the current Operating System language. If the Operating System is in one of the four supported languages, Reaction Lab will automatically open in that language.
If you wish to change language:
- Click the ‘Globe’ button on the right side of the toolbar; a menu with a list of languages appears
- Click on the desired language: a message indicates that the language changes take effect after restarting Reaction Lab
- Click ‘OK’ to restart Reaction Lab in the desired language.
When you open a New Reaction Lab model, you will see seven panels: Overall Step, Materials, Reactions in Solution, Process Scheme, Scenarios, Experimental Data and Data Chart.
You can copy the structures of your Starting Materials and Products in the Overall Step, list all the components (including Reagents and Solvents with the chemical formulas and molecular weights) in the Materials section and define your reactions in the Reactions in Solution panel.
In the Process Scheme section you can define your phases (gases, liquid and solids) and input your own user-defined or custom calculations. You can enter the starting conditions of your experiments in the Scenarios panel and your reaction profiles / experimental data in the Experimental Data section. Your data can be visualized using the Data Chart.
These are all described in more detail in other branches of the Reaction Lab help tree. Summry information about the user interface is given further down this page. It's worth reading and will save you time!
Once you have included information in the above sections of the Model tab, you will often use the large icons at the top of the screen to take your model into the Simulator, Fitting or Optimization screens. Information on how these screens work is provided in other branches of help system, including some of the Dynochem branches. You can also press the F1 key in any screen to open a related section of help.
Menus are located on the top of the Reaction Lab interface. There are five menu items in the menu bar:
- File: This menu handles all the input and output of the data as well as file specific functions such as Open, New and Save.
- Edit: Includes all functions required to modify a model such as adding materials, and changing the Process Scheme.
- Run: This menu has all the function required to run a RxL model.
- Window: Manage your model and the entire window.
- Help: Contains information on how to contact our support team and suggest development requests.
|
|
New: Creates a new file |
| Open: This allows you to browse your computer or network drives, choose a model and open it. | |
| Save: This saves your current model | |
| Save As: This allows you to browse your computer or network to choose a location and specify a file name to save your current model | |
| Save All: This allows you to browse your computer or network to choose a location and specify a file name to save all your current model | |
| Attach Files: This allows you to attach files to your Reaction Lab model. It attaches these files in the Attachments section. | |
| Import: This allows you to import either Experimental data (.txt or .csv file formats) or molecule data where either (i) chemical metadata can be imported by importing from either .cdxml, .cdx, .mol or .sdf file, or (ii) solely image files such as png, jpg, jpeg, gif, tif, tiff or bitmap files. | |
| Export: Exports a model to MS Word, Excel, PowerPoint or the Browser as a .html file. | |
| Security: This allows you to add/remove Password protection to your Reaction Lab model. | |
| Recent: Allows you to open any of the models you have recently used. | |
| Close: Closes the current model | |
| Restart: This restarts Reaction Lab | |
| Exit: Close Exits Reaction Lab and closes all model that were open |
| Add Material: This functionality allows you to enter (i) a general component (e.g. a starting material, reagent, product, impurity or inert gas), or (ii) a component from the database, a file from your computer or the clipboard. | |
| Process Scheme: This allows you to add any phase to your process scheme in your model (miscible liquid, immiscible liquid, feed vessels, solid and precipitating phase and a gas phase. | |
| Scenarios: This allows you to add a new scenario, add/remove a scenario header | |
| Data: This allows you to add/remove data header(s) |
| Simulator: This sends you model into the Simulator environment. This will be in a separate tab. | |
| Fitting: This sends you model to the Fitting window. This will also be in a separate window. | |
| Optimization: This sends your model to the Optimization window. | |
| Run All Scenarios: This runs all the scenarios and writes the results into an Excel report | |
| Run All Scenarios (Save profiles): This runs all the scenarios and write the results into an Excel report, which also contains a separate tab for each scenario, containing the time profiles | |
| Run Selected Scenarios: This opens a new window that allows you to choose which scenarios to run, then runs those and writes the results into an Excel report | |
| Verification: This runs your selected scenarios that contain experimental data and generates a report in Excel that contains comparisons between model predictions and measured data. | |
| Full Factorial: This opens a new window that allows you to simulate a full factorial study, and saves the results in an Excel file and the response surfaces in a browser window. |
| Create Duplicate: This command creates a duplicate of the current model | |
| Close: This closes the current model (and brings you to the model to the left of the model) | |
| Close All Models: This command closes all models and brings you | |
| Close all Models But This: This closes all other model apart from the model currently in focus | |
| Home: This brings you to the home tab. If you have a model currently open, the Model name will appear below this. Just select this to open the model. |
| Help: This bring you to this help document | |
| Contact Support: This brings you to an email to contact our support should you have any questions about Reaction Lab | |
| My Account: This brings you to your account, where you can obtain information on your license entitlements | |
| Give your Feedback: This sends you to an email so you can provide feedback on what you like about the software, what we can do better and what new feature you would like to see. | |
| About: Displays information about the versions of Reaction Lab, Windows, Office, etc. |
|
New Model |
<> |
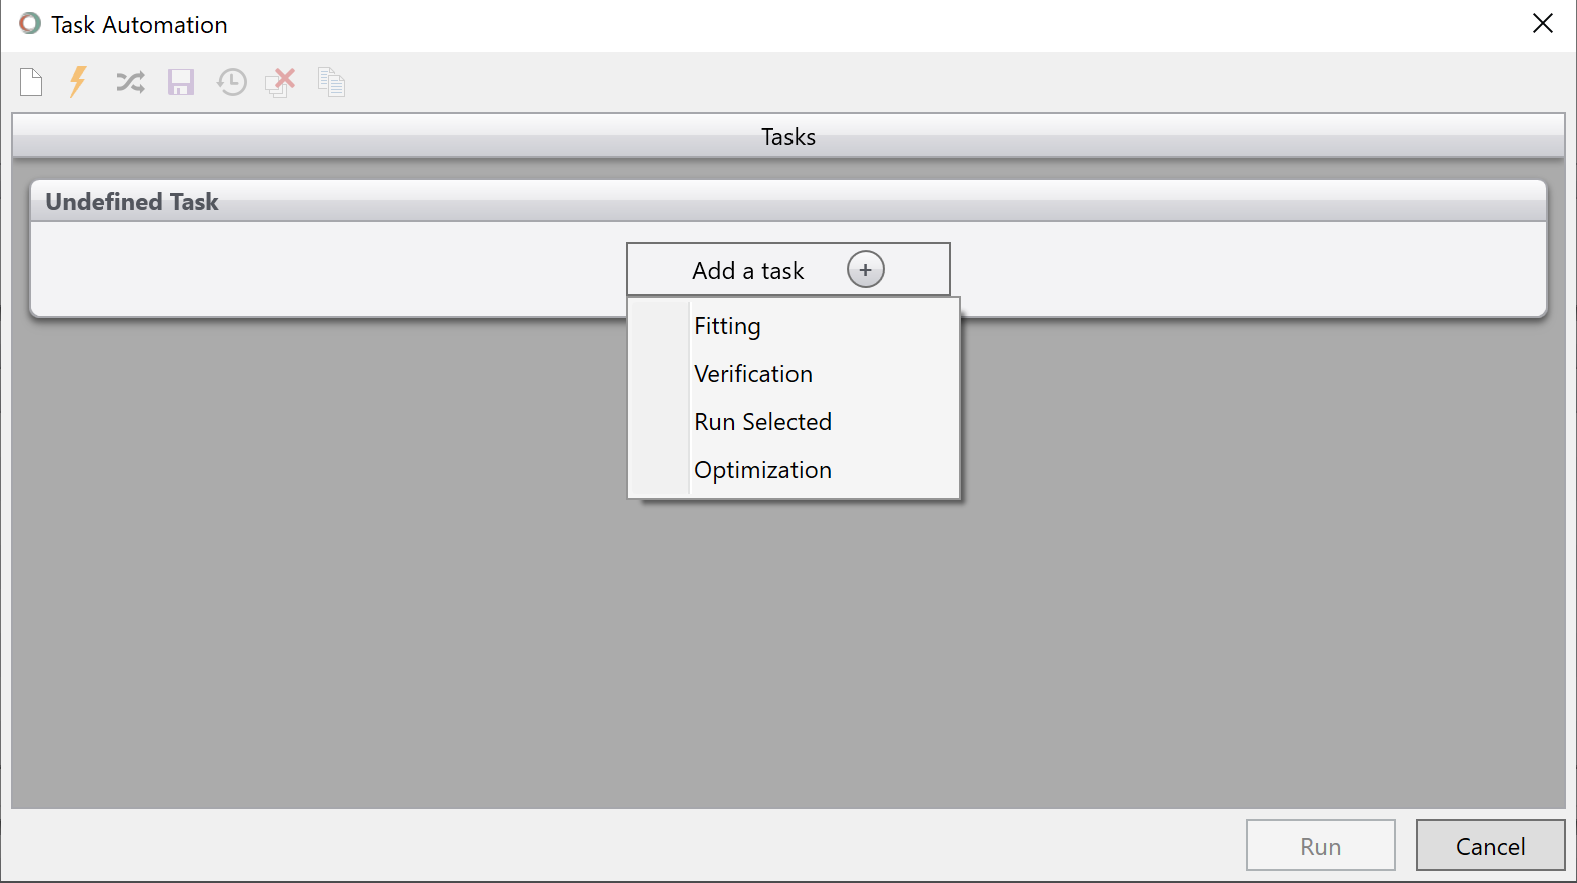
Automate a task, including access to the 'Harry Potter' button |
|
|
Open Model |
Run All Scenarios |
||
|
Save Model |
Run a Full Factorial exploration and generate a response surface / design space |
||
|
Open Model in Simulator |
Export Model as Excel file formatted to run in Dynochem |
||
|
Open Model in Fitting |
Export Model to Word |
||
|
Open Model in Optimization |
Export Model to Browser |
New in Reaction Lab 2 (Scale-up Suite 2), you can create and save commonly used or repeated workflows that may be executed directly and reproducibly from your model with minimal effort:

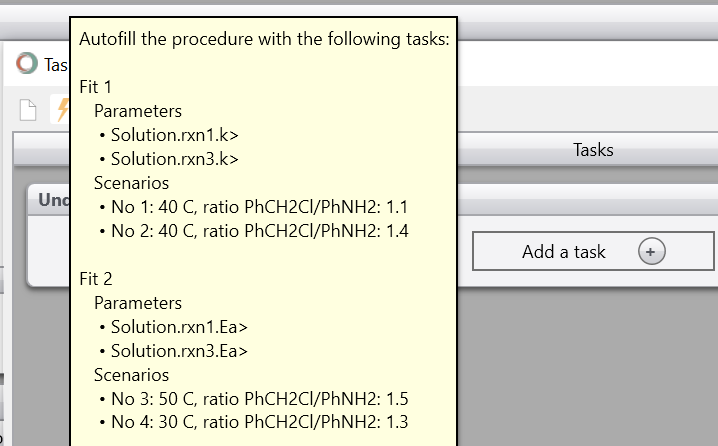
Of special interest is the Harry Potter button, indicated by the lightning bold in the Task Automation window. This intelligently scans your model and creates an automated set of workflows (like the ones experts run manually) that you can use to quickly fit kinetics and optimize your reaction with just a few clicks:

We'd love to get your feedback on these features to support@scale-up.com and there will be much more of this to come in future releases.
| Ctrl + N | New | Ctrl + Alt + A | Run All Scenarios |
| Ctrl + O | Open | Ctrl + Alt + P | Run All Scenarios (Save Profiles) |
| Ctrl + S | Save | Ctrl + Alt + R | Run Selected Scenarios |
| Ctrl + Shift + S | Save As | Ctrl + Alt + V | Verification |
| Ctrl + Alt + S | Save All | Ctrl + Alt + F | Full Factorial |
| Alt + A | Attach Files | Alt + D | Create Duplicate |
| Ctrl + D | Import experimental data in .csv and .txt file format | F1 | Help |
| Ctrl + M | Imports molecule data | F2 | Contact support |
| Ctrl + E | Exports to Excel | F3 | My account |
| Ctrl + W | Exports to Word | F4 | Give your feedback |
| Ctrl + P | Exports to PowerPoint | F5 | About |
| Ctrl + B | Exports to Browser | ||
| Ctrl + F4 | Close | ||
| Alt + F4 | Exit | ||
| Ctrl + F5 | Simulator | ||
| Ctrl + F6 | Fitting | ||
| Ctrl + F7 | Optimization |